Tesla Owners Online Forum banner

Guide: Model 3 SR+ aftermarket to enable speakers and subwoofer upgrade install

459K views 555 replies 120 participants last post by  peco77  
#1 · (Edited by Moderator)
Model 3 SR / SR+ owners:

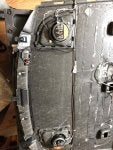
Newer 2020+ model 3 SR+ >>> Your car might not come with rear shelf speakers so you need to add in the speakers..See jpsingh user guide and removal of the rear shelf.

I completed an upgrade to my SR+ sound system. Following from posts before and thanks to users @fstr, @_Travis_ , @Dfwatt, @Flashflooder, @LRonHoyabembe, @Ingineerix and many others in here I was able to do it myself.

Moderator: Please don't merge this thread. I like to create this How-To thread specific for SR / SR+ car build that has different wiring from the premium build, and a specific thread like this for SR for easy visibility and SR to share thoughts and not get confused with the premium build mix.

SR+ speaker system background notes: It is not possible (based on my car setup) for future software updates to activate the side mirror tweeters and rear shelf speakers. I confirmed in my installation that those speakers are there but the wiring for the speakers did not connect to anything. Also no subwoofer.

Plan: Tap and get signals from the left-right door woofer to use for the signal of the aftermarket subwoofer. Also, tap and get signals from the rear door speakers 4" to get signal for the two-door tweeters and two rear shelf speakers. I have never done a sound upgrade for a car before but my dislike for the SR+ sound compelled me to do the upgrade myself (I also didn't trust outside car stereo shops).

Basically, after done, it will power the two tweeters near the door windows and power two rear 4" speakers in the back of the car, and also add a subwoofer that will fit in the lower area of the trunk.

The four main products I'm using are: Pioneer 10" shallow subwoofer, Alpine KTP-445U amp (to power the extra speakers that are inactive now), LC7i, and Pioneer GMD8701 amp
I could have combined the two amps and picked maybe a 5 channels amp instead of two amp but already brought it.
----Update on subwoofer: I find the 12" sealed pioneer to be overpowered for my music listening (nonrap/hip hop genre). Consider a smaller sealed sub if you're into vocal/classical music. So far, I'm using 10" and I like it, but maybe even 8" sealed pioneer can be good too. I had to face my sub facing up because it caused too much distortion when facing down in the sub-trunk area. So if your sub sounds terrible with a lot of rumbling/distortion, try placing it in different directions.

Direction:
Please look at this post to find the installation guide: first post. I'm adding more information below to explain more.

WIRING/POLARITY: Since I couldn't open up the rear shelf to access the speakers' polarity, I brought a polarity tester device. This will save you a lot time so you don't have to open up the doors to find speaker coloring/polarity.

Rear shelf 4" speakers: (Right: Yellow - , Gray +) (Left: White- , Purple +)
Rear door 4" speakers: (driver's (left) Black -, Red +) (Passenger (right) Blue +, Green -)
Door mirror tweeters: (Passenger (right): Red - , White +) (driver's (left): Purple - , Black +)
-Caution: remember to turn on your amp high pass filter/add bass blocker when powering tweeters connections
Door woofer: (driver's (left): Blue -, White +) (Passenger (right): Orange +, Black -)

Time-saving step: For tapping signal from the L/R rear door 4" speakers, I originally had to open up the B pillars (as shown in the picture below) because I had no idea what coloring they were. But now knowing what color they are, and knowing that these wires had to run to the front of the car, YOU can tap these wires for a signal without the hassle of opening up the B pillars. Wires will be taped and twisted around each other, and are quite thin.

The tricky part: making a connection to wire the right door tweeter. You will know what I mean when you attempt it. In my SR+ build in March, the left side has extra wiring coming out of the white plastic connector, whereas the right tweeter has no wiring after the white connector. The space on the right was tight that I ended up splicing the wire out of the white connector since there was no space inside to use a t-tap (I use a wire stripper in there, strip it out using an 18/20g strip, and connect a new wire to it). Also, remember the left driver door mirror tweeter has extra wires coming out after the white connector, you need to cut these existing wires out otherwise you will do some sort of back feeding to the stock amp (so not-tap at all for this driver side tweeter, only straight connection to this tweeter and amp).
---Update: @Vector used a PC socket adapter on this passenger tweeter, so this method might be easier for you, read here

Removal of door trim: to access the wiring for the rear door speakers, you need to remove the bottom B panel trim. You need to remove the front and back of the trim before you can remove the middle B panel trim. The removal should be sequential like this: remove the bottom rear seats and side door leather, remove the bottom black plastic trim (just pull up), remove black trim near the driver seat, and finally remove B pillar black trim by pulling away starting from the bottom. I just opened the B panel trim just enough to access wires for the signal. Caution: there's a wire loom that sits on the door trim near the front, don't try to splice any of this since it has an orange sticker that says attempting to do so might trigger the airbag. Check out this schematic of door trims.

T-tap: The wire gauge for the tweeters and 4" speakers are thin (maybe 20gauge), so the t-tap might or might not work. I t-tap several wires but when checking, one connection plastic covering didn't sheer off the t-tap for there to be a connection. I ended up splicing the wires for these to make sure the connection works. You might or might not experience this. If you don't want to slice wires, you can also try the posi-tap connector which is more expensive. I don't recommend the regular t-tap connector.

Penthouse 12V+ to power amp: A trick I found if you are afraid of shorting the connector when working, you can wait till the penthouse 12v+ is off. Leave all doors & trunks open for some amount of time, after a while, you will hear a big clunk near the penthouse to indicate the high voltage connector is off. You can check that this 12V penthouse is off by trying to adjust the front seats (it won't move), the screen is off, and the trunk lighting is off. I tested using a multimeter on the penthouse 12V at this time and it registered no power. I use the same bolt on the 12V+ by taking the lid off the red plastic covering and removing the bolt and putting the connection under it and screwing it back again.

12V+ Remote in As noted by user first, the 12V+ (aka VCLeft 12v) to supply the amp remote in that Ingineerix video pointed to has a thick red wire attached to it in my car. I believe the newer car build might have a red wire attached to this pin. So all you need to do is t-tap into this for power. For my setup (yours can vary), this accessory LCleft 12V+ power the LC7i "12V power", then LC7i "remote out" line powers the alpine "remote in", then the alpine "remote out" powers the subwoofer amp "remote in". My LC7i "remote in" is empty since I have the LC7i jumper setting for GTO on (see pic).

Alpine KTP amp: If you have trouble figuring out which wiring configuration works best you can try this. I have the rear doors speakers splits to 4channel(=8wires) > go to LC7i main+ch1 input>LC7i output main+ch1 go to alpine input for front+rear. Set the alpine jumper to 4ch and speaker input(non-RCA).

LC7i: If you use LC7i leave GTO on as default (see pic). Also, this LC7i has AccuBASS which is very useful to increase the low-end frequencies that are needed for the subwoofer.

Grounding terminal: SR+ has a black plastic covering where the subwoofer would be in a premium. I use the bolt that holds this plastic piece near the right taillight as my ground (-) wiring.

Amplifier: The Pioneer GMD8701 is a refreshed 2019 lineup for pioneer amps and it comes with a nice wire remote control for bass. I read certain high power amps might cause the error "cannot maintain vehicle power" but this one so far has not given me any error. If you want to be sure or if u use a big amp, you can add a relay from this thread. I didn't do relay and it has been 3 months with this setup and the car hasn't thrown any system error.

Sub Trunk Guide: You can run all the wires to the right side below the trunk liner (see video below for trunk removal), and from there use a small knife to cut a cross-cut (+) in the sub trunk for all wires to pass into. I do this cut instead of drilling since later on if the wires are removed, the sub-trunk fabric falls back into place as if it wasn't cut out before. In this setup, all amp, lc7i, and subwoofers are hidden in the sub-trunk area. Caution: to prevent the liquid bottom from dripping into this area and ruining the equipment, be sure you have an all-weather rubber mat on the top or place something in this sub-trunk area to prevent accidental liquid from going in.

Helpful videos:
Ingineerix 12V+ accessory video , front door plastic trim removal, rear door removal, trunk removal lining, and backseat removal

Materials used: 100ft speaker wires, t-tap connector or positap, 8 gauge subwoofer wiring kit or 4 gauge kit

Future work for SR+ sound: The top speakers near the A-pillar aren't working now. I might attempt to run wires down and power the speakers in parallel to the door mirror tweeters.
--Update on this top A-pillar speakers: I was able to do this by splitting the power going to the mirror tweeters. You can read it here. I would say this adds a slight moderate sound improvement. Read here

That's all for now. Please share your thoughts, set up, and equipment used.

Image
Image
Image
Image
Image
Image
Image
Image
Image
Image
 
#350 · (Edited)
Hi guys, dumb question since I'm extremely unfamiliar with this type of stuff. I plan on adding the alpine ktp445u and lc7i. Since I want to use only the penthouse for powering the amp and loc, can I just install a ring terminal connector to the power and ground wires, and connect them into the 12v of penthouse and nearby bolt for ground?
Also, what's the best place to tap into for my tweeter? The rear doors or the front dash?
Lastly, I don't understand where I would utilize the 4 or 8 gauge power cables. The amp already has a yellow power cable and the lc7i can't fit the 4 or 8 gauge power cables. Thanks!
 
#351 · (Edited)
So nobody answered my questions from my last post but I decided to tap into the front dash to get the rear decks working. Sounds amazing! I haven't wired in the tweeters yet but I might just skip that altogether, just because I don't have the time and I don't think it's worth the effort. Might wire them in if I find myself with a bunch of free time though. I'm going to install a sub in the next couple of days depending on how much time I have and I plan to to mount it onto the plastic placeholder in the rear trunk space where the oem sub would be. I also plan to mount my lc7i onto the same plastic bracket so hopefully when I'm done everything would look OEM and no wires will be seen.

Some things to note from my build... I used the ICE audio out connectors to do all my wirings and I could not for the life of me pull out the connector?? I was pushing on the clip and pulling pretty hard and it would not come out. I don't know if I didn't pull it hard enough or I forgot to do something else but I just decided to tap it while it was still connected. This made it extremely tight, but in this situation, posi taps really helped! No relays or resisters were used. Mostly because I didn't know how to use them haha... I would like to point out that I am still extremely unfamiliar with these types of things, so I could have done some parts wrong and waiting on the error message. But riding around town all day I have yet to receive any errors.

To anyone that's completed the build and still following the forum, when wiring into the penthouse, did you wire it in a way where you could still close the rubber seal in the end? Because now the seal just stays open which I don't mind but was curious to see how you guys did it.
 
#352 ·
So nobody answered my questions from my last post but I decided to tap into the front dash to get the rear decks working. Sounds amazing! I haven't wired in the tweeters yet but I might just skip that altogether, just because I don't have the time and I don't think it's worth the effort. Might wire them in if I find myself with a bunch of free time though. I'm going to install a sub in the next couple of days depending on how much time I have but and I plan to to mount it onto the plastic placeholder in the rear trunk space where the oem sub would be. I also plan to mount my lc7i onto the same plastic bracket so hopefully when I'm done everything would look OEM and no wires will be seen.

Some things to note from my build... I used the ICE audio out connectors to do all my wirings and I could not for the life of me pull out the connector?? I was pushing on the clip and pulling pretty hard and it would not come out. I don't know if I didn't pull it hard enough or I forgot to do something else but I just decided to tap it while it was still connected. This made it extremely tight, but in this situation, posi taps really helped! No relays or resisters were used. Mostly because I didn't know how to use them haha... I would like to point out that I am still extremely familiar with these types of things, so I could have done some parts wrong and waiting on the error message. But riding around town all day I have yet to receive any errors.

To anyone that's completed the build and still following the forum, when wiring into the penthouse, did you wire it in a way where you could still close the rubber seal in the end? Because now the seal just stays open which I don't mind but was curious to see how you guys did it.
I was thinking of putting my stuff in the OEM sub location, but decided against it since I plan on eventually throwing a sub in there, OEM or otherwise.

I had trouble getting the ICE connector out, too. Fortunately, I had a mechanic friend hanging out with me while initially pulling everything apart and he forced it... Since he's used to it, and I wasn't and pulled too delicately. I assume you saw the clip on the front of the connector? I had a hard time initially getting it to "unclip," so I used a screwdriver or something else to push it while I rocked the connector out. Now, it is pretty easy to do with one hand (without some tool to push the clip). Even then, I still had trouble getting my hands in there to tap well.

Tapping into the penthouse, I basically brute forced the rubber cover back on, until the black Styrofoam sat correctly and the seat cushion reattached. I find of strung it , so that it would stick out where there was a tiny cutout. If I remember correctly, it was where the cover meets the plastic that connects it to the bolt. I assume you have a fuse, though? :)
 
#355 ·
If I go with the JL Audio RD900/5 would the LC7i still be needed? Looks like this unit also has Signal-sensing turn-on circuit so may not need to run remote on wire. Planning to use the amp for the Rear shelf 4" speakers, Rear door 4" speakers and also a Jl Audio 10tw3-d4 Shallow-mount 10 in a downfire enclosure. What is the best layout with this unit? Since this only has 4 channels + sub, I assume there is not way to get power to all of the dormant speakers?

Image


Thanks
 
#357 ·
The JL Audio RD900/5 is bit overkill for the OEM speakers. The 4" fullrange speakers are rated for 35W and the front tweeter (if you are going this route) is 25W while the RD900/5 is 75W per channel. This is why many (but not all) upgrades are using the smaller Alpine, Kenwood, Pioneer and Kicker amps (less than 50W/channel).

The rear door 4" are already powered, so you don't necessarily need to hook them to an amp. That would free up two channels to power the front door tweeters.

The RD900/5 has a true "signal sensing" turn-on mode in addition to a DC sensing turn-on mode. The "signal sensing" mode is important because I've noticed when the Tesla wakes up the DC on the audio lines turns on even when there is no audio which keeps one of my amps powered up while the car is awake. So, no you don't need the LC7i if you end up using the RD900/5.

If I go with the JL Audio RD900/5 would the LC7i still be needed? Looks like this unit also has Signal-sensing turn-on circuit so may not need to run remote on wire. Planning to use the amp for the Rear shelf 4" speakers, Rear door 4" speakers and also a Jl Audio 10tw3-d4 Shallow-mount 10 in a downfire enclosure. What is the best layout with this unit? Since this only has 4 channels + sub, I assume there is not way to get power to all of the dormant speakers?

Thanks
 
#356 · (Edited)
I finished my build. Adding a subwoofer adds a totally new dimension to the music and if you're already going to enable the rear shelf speakers you should definitely add the sub. I went with the kenwood ksc-sw11 that was also mentioned by another user. It is self amplified so I just connected it to my lc7i, and powered from the penthouse. Decided to mount both my lc7i and sub on the plastic bracket in the empty trunk space. Everything looks absolutely OEM with no loose wires.

edit: hmu if you're in the phoenix area and would like to have me install yours in this method, provided the car came with pre-existing speakers
 

Attachments

#359 ·
I finished my build. Adding a subwoofer adds a totally new dimension to the music and if you're already going to enable the rear shelf speakers you should definitely add the sub. I went with the kenwood ksc-sw11 that was also mentioned by another user. It is self amplified so I just connected it to my lc7i, and powered from the penthouse. Decided to mount both my lc7i and sub on the plastic bracket in the empty trunk space. Everything looks absolutely OEM with no loose wires.
I like the equipment choices you have made I'd like to model your setup. Can you possibly share you wiring part list also?
 
#366 ·
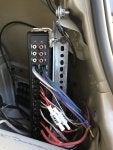
I completed my SR+ audio upgrade with the addition of a stock Tesla subwoofer, Kenwood X802-5 five channel class D amp with remote bass control and a Kicker Kisloc level converter for the sub signal. Thanks goes out to Plur for all the info he provided. The amp could take speaker level inputs from tapping the two rear door speakers but only preamp levels for the sub signal hence the need for the level converter. I installed the amp in the original location next to the sub which required the fabrication of a plate and the use of 3 pieces of angle aluminum. The plate was attached to the chassis with one existing stud at the rear and one added stud in the front. The added stud was adhered to the chassis with construction adhesive. This allows the plate to be removed if necessary. My pics aren't the best but hopefully they will provide enough information to understand the installation. The glued in stud was first pressed into a large stainless steel washer to provide more surface area. To connect to the front tweeter connectors that Plur identified I harvested the pins from the rear shelf connector. I could not determine how to extract the pins so I ended up slicing up the connector housing to remove the 4 pins for the shelf speakers and soldered them on to wires for the tweeter connections. The top of the amp bracket is secured to one of the existing mounts for the removed plastic shield. This makes for a very sturdy attachment method. The level control is mounted with two sided foam tape on the plate to the rear of the amp and the base control is mounted the same way up next to the drives seat down low on the plastic door trim close to the B pillar. I pulled power from the penthouse and since the amp has signal sensing to turn on, a remote turn on connection was not needed. I used cardboard to make a template for the base plate and the studs can be pressed in with a vise or hammer and socket. Two studs are pressed into the base plate to attach the lower angle bracket and two holes are drilled into the base plate, one for the existing stud to pass through and one for the glue in stud/washer assembly to pass through. I do not have a part number for the studs, they are 1/4-20 stainless steel. The amp is mounted with the controls facing outward for access if needed. As stock sub is plenty for me and the overall sound is much improved. It was a bit time consuming but well worth it. Thanks for all the help from the forum!

 
#367 · (Edited)
I completed my SR+ audio upgrade with the addition of a stock Tesla subwoofer, Kenwood X802-5 five channel class D amp with remote bass control and a Kicker Kisloc level converter for the sub signal. Thanks goes out to Plur for all the info he provided. The amp could take speaker level inputs from tapping the two rear door speakers but only preamp levels for the sub signal hence the need for the level converter. I installed the amp in the original location next to the sub which required the fabrication of a plate and the use of 3 pieces of angle aluminum. The plate was attached to the chassis with one existing stud at the rear and one added stud in the front. The added stud was adhered to the chassis with construction adhesive. This allows the plate to be removed if necessary. My pics aren't the best but hopefully they will provide enough information to understand the installation. The glued in stud was first pressed into a large stainless steel washer to provide more surface area. To connect to the front tweeter connectors that Plur identified I harvested the pins from the rear shelf connector. I could not determine how to extract the pins so I ended up slicing up the connector housing to remove the 4 pins for the shelf speakers and soldered them on to wires for the tweeter connections. The top of the amp bracket is secured to one of the existing mounts for the removed plastic shield. This makes for a very sturdy attachment method. The level control is mounted with two sided foam tape on the plate to the rear of the amp and the base control is mounted the same way up next to the drives seat down low on the plastic door trim close to the B pillar. I pulled power from the penthouse and since the amp has signal sensing to turn on, a remote turn on connection was not needed. I used cardboard to make a template for the base plate and the studs can be pressed in with a vise or hammer and socket. Two studs are pressed into the base plate to attach the lower angle bracket and two holes are drilled into the base plate, one for the existing stud to pass through and one for the glue in stud/washer assembly to pass through. I do not have a part number for the studs, they are 1/4-20 stainless steel. The amp is mounted with the controls facing outward for access if needed. As stock sub is plenty for me and the overall sound is much improved. It was a bit time consuming but well worth it. Thanks for all the help from the forum!

View attachment 32893 View attachment 32883 View attachment 32887 View attachment 32888 View attachment 32891 View attachment 32884 View attachment 32886 View attachment 32885 View attachment 32889 View attachment 32892
Did you use a relay for the amp? did some research and Seems like that amp has a like a 90 amp high draw. Does the draw of the amp matter?
 
#368 · (Edited)
Update: So I finally went about in tapping in the mirror tweeters. I initally left them out of my build because judging from other posts it seemed like a big pain for little benefit. And while they don't impact as much as the rear speakers I just wanted to get my full money's worth out of my amp. As it turns out, it's nowhere near as difficult as others made it seem to be. The driver side was extremely easy as there's plenty of wire to work with. Keep in mind PLUR mentioned in his original post to splice the driver tweeters to prevent backfeeding to stock amp. The passenger side is a little trickier since you have no extra wire to work with. I pulled out the harness boot and spliced the wire as close to the connector as possible, so I could pull it out of the harness boot, posi-locked it with my own wire, and ran it back inside the passenger door and back to the amp. Resealing the harness boot can be a little tricky but it really doesn't matter if you don't get it perfect since it won't be seen anyway.
 

Attachments

#371 · (Edited)
Thanks to this thread, I finished upgrading the audio on my 2020 M3 SR+ today. I went with an LC7i paired with a Rockford Fosgate R2-750X5 and a Kicker Down-Firing 10" CompRT 2-Ohm Enclosure. I was not originally going with the LC7i since this amp has high inputs but I knew I would want to nerd out with the levels to get the best possible sound. Between the LC7i and the amp, I am able to dial in the high pass range and levels pretty well to tune the rear decks and avoid flooding the front with raspy highs. It was more planning and work than anticipated but 100% worth it. The audio sounds amazing now with dormant speakers activated and 10"sub. A few notes and pics...

- Used the penthouse 12V and was able to get a 120A fuse underneath the front lip of the back seat secured with gorilla tape.
- Used 4AWG AMP install kit but needed longer ground wire and wire for LC7i. I didn't use the fuse that came with the amp kit but the nut fit the 12V terminal.
- Even after 30+min with doors/trunk open and everything off, the 12V was still live so I made sure to wire everything and ground before connecting to the terminal with a new nut on top of the existing one.
- Used line signal for LC7i turn on and remote out from there to amp. Unfortunately, using the the line signal (GTO) for for turn on resulted in the system staying on indefinitely. I ended up tapping the red VC_LEFT wire behind the driver panel with a Posi-Tap #PTA1218M 12-18. The Metra twisted wire does have a blue remote wire so was able to use that after routing from the passenger side underneath the dash along with the left mirror speaker connections from amp.
- Used OEM sub mount point for ground as mentioned in 1st post.
- I tapped the dash, front subs and rears at the ICE using the mapping here. This was the most difficult part of the install even with posi taps.
- I made a basic amp rack using all weather mat for the sub trunk as a template. It sits near the bottom of the sub trunk and has a riser above it to reclaim what was left of the space. I left enough wire for a service loop that sits under the amp rack in the gap. Also put distro blocks on rack for power and ground and a 5A fuse on the LC7i thats underneath the rack.
- For the speaker wire I ran 2 x Metra MC918-20 sheathed together in 1 x 1/2 inch PET Expandable Braided Sleeving. This turned out to be perfect since a single run along the right side held all of the taps for the inputs and I still had 2 pairs left over to go back out to the front mirror tweeters. I used the sleeving throughout the entire build and really liked the protection and pseudo factory look. Made it easier to run the wires as well.
- Since all of my wires were on the passenger side, I had to run the driver mirror tweeter under the dash by gently feeling with a coat hanger until I got through.
- Heat shrink connectors for all splicing and zip ties where needed.
- Credit to the folks who did the heavy lifting to get the ICE / wiring and polarity. Here is the spread sheet I made from that data for the Metra MC918-20 x 2 bundled run.
 

Attachments

#378 ·
Thanks to this thread, I finished upgrading the audio on my 2020 M3 SR+ today. I went with an LC7i paired with a Rockford Fosgate R2-750X5 and a Kicker Down-Firing 10" CompRT 2-Ohm Enclosure. I was not originally going with the LC7i since this amp has high inputs but I knew I would want to nerd out with the levels to get the best possible sound. Between the LC7i and the amp, I am able to dial in the high pass range and levels pretty well to tune the rear decks and avoid flooding the front with raspy highs. It was more planning and work than anticipated but 100% worth it. The audio sounds amazing now with dormant speakers activated and 10"sub. A few notes and pics...

- Used the penthouse 12V and was able to get a 120A fuse underneath the front lip of the back seat secured with gorilla tape.
- Used 4AWG AMP install kit but needed longer ground wire and wire for LC7i. I didn't use the fuse that came with the amp kit but the nut fit the 12V terminal.
- Even after 30+min with doors/trunk open and everything off, the 12V was still live so I made sure to wire everything and ground before connecting to the terminal with a new nut on top of the existing one.
- Used line signal for LC7i turn on and remote out from there to amp.
- Used OEM sub mount point for ground as mentioned in 1st post.
- I tapped the dash, front subs and rears at the ICE using the mapping here. This was the most difficult part of the install even with posi taps.
- I made a basic amp rack using all weather mat for the sub trunk as a template. It sits near the bottom of the sub trunk and has a riser above it to reclaim what was left of the space. I left enough wire for a service loop that sits under the amp rack in the gap. Also put distro blocks on rack for power and ground and a 5A fuse on the LC7i thats underneath the rack.
- For the speaker wire I ran 2 x Metra MC918-20 sheathed together in 1 x 1/2 inch PET Expandable Braided Sleeving. This turned out to be perfect since a single run along the right side held all of the taps for the inputs and I still had 2 pairs left over to go back out to the front mirror tweeters. I used the sleeving throughout the entire build and really liked the protection and pseudo factory look. Made it easier to run the wires as well.
- Since all of my wires were on the passenger side, I had to run the driver mirror tweeter under the dash by gently feeling with a coat hanger until I got through.
- Heat shrink connectors for all splicing and zip ties where needed.
- Credit to the folks who did the heavy lifting to get the ICE / wiring and polarity. Here is the spread sheet I made from that data for the Metra MC918-20 x 2 bundled run.
I see you didn't install a solid state relay and resistor. Have you noticed any error messages?
 
#374 ·
Model 3 SR / SR+ owners:

I completed an upgrade to my SR+ sound system. Following from posts before and thanks to users @fstr, @_Travis_ , @Dfwatt, @Flashflooder, @LRonHoyabembe, @Ingineerix and many others in here I was able to do it myself.

Moderator: Please don't merge this thread. I like to create this How-To thread specific for SR / SR+ car build that has different wiring from premium build, and a specific thread like this for SR for easy visibility and SR to share thoughts and not get confused with the premium build mix.

SR+ speaker system background notes: It is not possible (based on my car setup) for future software updates to activate the side mirror tweeters and rear shelf speakers. I confirmed this in my installation that those speakers are there but the wirings for the speakers did not connect to anything. Also no subwoofer.

Plan: Tap and get signals from the left right door woofer to use for signal of aftermarket subwoofer. Also, tap and get signals from the rear door speakers 4" to get signal for the two door tweeters and two rear shelf speakers. I have never done a sound upgrade for a car before but my dislike for the SR+ sound compelled me to do the upgrade myself (I also didn't trust outside car stereo shop).

Basically after done, it will power the two tweeters near doors windows and power two rear 4" speakers in back of car, and also adding a subwoofer that will fit in lower area of trunk.

The four main products I'm using are: Pioneer 10" shallow subwoofer, Alpine KTP-445U amp (to power the extra speakers that are inactive now), LC7i, and Pioneer GMD8701 amp
I could have combined the two amps and pick maybe a 5 channels amp instead of two amp but already brought it.
----Update on subwoofer: I find the 12" sealed pioneer to be overpowered for my music listening (non rap/hip hop genre). Consider a smaller sealed sub if you're into vocal/classical music. So far, i'm using 10" and I like it, but maybe even 8" sealed pioneer can be good too. I had to face my sub facing up because it caused too much distortion when facing down in the sub-trunk area. So if your sub sounds terrible with a lot of rumbling/distortion, try placing it in different directions.

Direction:
Please look at this post to find installation guide: fstr post . I'm adding more information below to explain more.

WIRING/POLARITY: Since I couldn't open up the rear shelf to access the speakers' polarity, I brought a polarity tester device. This will save you a lot time so you don't have to open up the doors to find speaker coloring/polarity.

Rear shelf 4" speakers: (Right: Yellow - , Gray +) (Left: White- , Purple +)
Rear door 4" speakers: (driver's (left) Black -, Red +) (Passenger (right) Blue +, Green -)
Door mirror tweeters: (Passenger (right): Red - , White +) (driver's (left): Purple - , Black +)
-Caution: remember to turn on your amp high pass filter/add bass blocker when powering tweeters connections
Door woofer: (driver's (left): Blue -, White +) (Passenger (right): Orange +, Black -)

Time saving step: For tapping signal from the L/R rear door 4" speakers, I originally had to open up the B pillars (as shown in picture below) because I had no idea what coloring they were. But now knowing what color they are, and knowing that these wires had to run to the front of the car, YOU can tap these wires for signal without the hassle of opening up the B pillars. Wires will be taped and twisted around each other, and are quite thin.

Tricky part: making connection to wire the right door tweeter. You will know what I mean when you attempt it. My SR+ build in March, left side has extra wiring coming out of the white plastic connector, whereas the right tweeter has no wiring after the white connector. The space in the right was tight that I ended up splicing the wire out of the white connector since there was no space inside to use t-tap (I use a wire stripper in there, strip it out using 18/20g strip, and connect a new wire to it). Also, remember the left driver door mirror tweeter has extra wires coming out after the white connector, you need to cut this existing wires out otherwise you will do some sort of backfeeding to the stock amp (so no t-tap at all for this driver side tweeter, only straight connection to this tweeter and amp).
---Update: @Vector used a PC socket adapter on this passenger tweeter, so this method might be easier for you, read here

Removal of door trim: to access the wiring for the rear door speakers, you need to remove the bottom B panel trim. You need to remove the trims front and back before you can remove the middle B panel trim. The removal should be sequential like this: remove bottom rear seats and side door leather, remove bottom black plastic trim (just pull up), remove black trim near driver seat, and finally remove B pillar black trim by pulling away starting from bottom. I just opened the B panel trim just enough to access wires for signal. Caution: there's a wire loom that sit on the door trim near the front, don't try to splice any of this since it has an orange sticker that says attempting to do so might trigger the airbag. Check out this schematic of door trims.

T-tap: The wire gauge for the tweeters and 4" speakers are thin (maybe 20gauge), so t-tap might or might not work. I t-tap several wires but when checking, one connection plastic covering didn't sheer off the t-tap for there to be a connection. I ended up splicing the wires for these to make sure the connection works. You might or might not experience this. If you don't want to slice wires, you can also try the posi-tap connector which are more expensive. I don't recommend the regular t-tap connector.

Penthouse 12V+ to power amp: A trick I found if you are afraid of shorting the connector when working, you can wait till the penthouse 12v+ is off. Leave all doors & trunk open for some amount of time, after a while you will hear a big clunk near penthouse to indicate the high voltage connector is off. You can check that this 12V penthouse is off by trying to adjust front seats (it won't move), screen is off, and trunk lighting is off. I tested using a multimeter on the penthouse 12V at this time and it registered no power. I use the same bolt on the 12V+ by taking the lid off the red plastic covering and removing bolt and putting the connection under it and screw it back again.

12V+ Remote in: As noted by user fstr, the 12V+ (aka VCLeft 12v) to supply the amp remote in that Ingineerix video pointed to has a thick red wire attached to it in my car. I believe newer car build might has a red wire attached to this pin. So all you need to do is t-tap into this for power. For my setup (yours can vary), this accessory LCleft 12V+ power the LC7i "12V power", then LC7i "remote out" line powers the alpine "remote in", then the alpine "remote out" powers the subwoofer amp "remote in". My LC7i "remote in" is empty since I have the LC7i jumper setting for GTO on (see pic).

Alpine KTP amp: If you have trouble figuring which wiring configuration works best you can try this. I have the rear doors speakers splits to 4channel(=8wires) > go to LC7i main+ch1 input>LC7i output main+ch1 go to alpine input for front+rear. Set alpine jumper to 4ch and speaker input(non-rca).

LC7i: If you use LC7i leave GTO on as default (see pic). Also this LC7i has AccuBASS which is very useful to increase the low end frequencies that's needed for the subwoofer.

Grounding terminal: SR+ has a black plastic covering where subwoofer would be in premium. I use the bolt that hold this plastic piece near the right taillight as my ground (-) wiring.

Amplifier: The Pioneer GMD8701 is a refresh 2019 lineup for pioneer amp and it comes with a nice wire remote control for bass. I read certain high power amp might cause the error "cannot maintain vehicle power" but this one so far has not given me any error. If you want to be sure or if u use a big amp, you can add a relay from this thread. I didn't do relay and it has been 3 months with this setup and car hasn't throw any system error.

Sub Trunk Guide: You can run all the wires to the right side below trunk liner (see video below for trunk removal), and from there use a small knife to cut a cross cut (+) in the sub trunk for all wires to pass into. I do this cut instead of drilling since later on, if the wires are removed, sub trunk fabric fall back into place as if it wasn't cut out before. This setup, all amp, lc7i, subwoofer are hidden in sub trunk area. Caution: to prevent liquid bottom from dripping into this area and ruin the equipment, be sure you have an all-weather rubber mat on the top or place something in this sub trunk area to prevent accidental liquid from going in.

Helpful videos:
Ingineerix 12V+ accessory video , front door plastic trim removal , rear door removal , trunk removal lining and backseat removal

Materials used: 100ft speaker wires , t-tap connector or positap , 8gauge subwoofer wiring kit or 4 gauge kit

Future work for SR+ sound: The top tweeter speakers near the A pillar aren't working now. I might attempt to run wires down and power the speakers in parallel to the door mirror tweeters.
--Update on this top A pillar tweeters: I was able to do this by splitting the power going to the mirror tweeters. You can read it here. I would say this add a very slight moderate sound improvement. Read here

That's all for now. Please share your thoughts, setup, and equipment used.

View attachment 26524 View attachment 26525 View attachment 26526 View attachment 26527 View attachment 26528 View attachment 26529 View attachment 26533 View attachment 26699 View attachment 26700 View attachment 26701
Any pictures of how the power cable was routed from the penthouse to the rear?
 
#376 ·
So, I started pulling apart my model 3, delivered February 2020, I don't have the wires for the rear shelf speakers in the connectors but I do see the gray and yellow wires twisted Together in the wire loom. Any help on this.
UPDATE: I removed the rear shelf and unfortunately found no speakers. I am just going to install my own speakers in the future. by car still has the front door tweeters though.
 
#377 · (Edited)
Just curious, is it the rear passenger side speaker?
Just finished wiring everything up and am getting noticeable hissing/static from my front tweeters. I tapped the ICE for all connections, using soundstream pnd5.640d(on ch4) penthouse for 12v +ground.

Door and a-pillar speakers wired in parallel with bass blockers using inputs from front mids.

Any suggestions other than re-re-checking my connections(positaps)

FYI rear deck speakers have no hissing/static so I've ruled out a bad ground. I've also swapped channels to rule out possibility of a bad amp. Also the noise is much more noticeable without the bass blockers
 
#385 ·
@asu_student
I just saw your post on the SR+ audio upgrade and have a few questions if you have time. I'd like to copy your exact setup (Rear Shelf and adding the sub with KTP-445U, LC2i and KSC-SW11). Not sure if I actually need the LC2i but I'll add it anyways.

1. You powered all 3 components directly onto the pentouse 12v positive terminal by connecting the 3 ring terminals and then grounding the corresponding ground wires to a common spot on the chassis?

2. For wire connections, I would tap the rear doors for the rear shelf and front doors for the subwoofer signals into the input harness of the 445U. Then on the output side of the 445U I'd connect the rear door wires to the corresponding wires on the harness for the rear speakers. Then I would feed the the front door wires outputting from the 445U into the speaker level input of the LC2i and connect RCA cables from Bass Output to the SW11. I'd also connect the remote out from LC2i to remote in 445U and remote out 445U to remote in SW11. Does that make sense? I figure that way the GTO of the LC2i would tell the amp and sub when to power off and on. Unless for GTO to work I need to have the speaker level inputs go in directly into the LC2i and not from the 445U?

Thanks for your help!
 
#387 · (Edited)
@asu_student
I just saw your post on the SR+ audio upgrade and have a few questions if you have time. I'd like to copy your exact setup (Rear Shelf and adding the sub with KTP-445U, LC2i and KSC-SW11). Not sure if I actually need the LC2i but I'll add it anyways.

1. You powered all 3 components directly onto the pentouse 12v positive terminal by connecting the 3 ring terminals and then grounding the corresponding ground wires to a common spot on the chassis?

2. For wire connections, I would tap the rear doors for the rear shelf and front doors for the subwoofer signals into the input harness of the 445U. Then on the output side of the 445U I'd connect the rear door wires to the corresponding wires on the harness for the rear speakers. Then I would feed the the front door wires outputting from the 445U into the speaker level input of the LC2i and connect RCA cables from Bass Output to the SW11. I'd also connect the remote out from LC2i to remote in 445U and remote out 445U to remote in SW11. Does that make sense? I figure that way the GTO of the LC2i would tell the amp and sub when to power off and on. Unless for GTO to work I need to have the speaker level inputs go in directly into the LC2i and not from the 445U?

Thanks for your help!
1. Correct. I powered all 3 connections via the penthouse. No relays or resistors other than what the sub and amp came with, and I still have not run into any errors. The grounding really doesn't matter just as long as you have a good connection to the metal.
2. So for my build, I tapped into the front dash for my rear deck and tweeters. The connections to the amp sounds correct, but you'd have to cut off the rca jacks in order to connect them that way. For the sub, you'd want to tap into the front door speakers, run them into the lc2i, and then directly to the subwoofer. Keep in mind the sw11 is a self-amplified sub, so no need for additional amplifiers. The 445u is only for the dormant speakers.

If you want to use an LOC for your speakers AND sub, then you'd need the lc7i. I think some people did the build without running their speakers through the lc7i and found their tweeters to be overpowering. I haven't tested that but for me, running my speakers through the lc7i sounds great. As for GTO I honestly have no idea if it properly works. When powered to the penthouse, the lc7i lights up whenever the penthouse is on, even when music is off. So this would lead me to believe the amp is on as well? I can't say for sure because there's no lights on the amp and I'm not very familar with the device anyway. But really not a big issue, since I'm listening to music whenever the car is on anyway, and when the car is off or alseep, the penthouse is off.
 
#386 ·
I currently have the front mirror tweeters running off the amp with a high pass crossover >250Hz. I’m planning to run the a-pillar tweeters in parallel and wondering if the bb-6pr bass blockers from this thread would be needed? Should the bass blockers go on just the a-pillars or also on the mirrors? I haven’t noticed any clipping or distortion on the mirrors but thinking it may be worth eliminating the lower spectrum all together.
 
#388 ·
I tried following the instructions on this thread. However i get a cloud hissing / electrical noise sound in the rear speakers for some reason. I have tried two different amplifiers with the same result.

I am powering it from the penthouse.
I have grounded it to the bolt where the seats connect to the side panel.
I tapped VC_LEFT for my 12V remote.
I tapped front woofers and rear speakers at the ICE connector with Posi-taps.
The two amps i am using have high level inputs, which i soldered the 16AWG cable coming from the tapped ICE connector to.

I have tried two different amplifiers. I know they are cheap and not used in this thread, but they are the only ones i could get my hands on quickly. While not optimal, i would assume they would work. I have tired both a Dual Electronics XPR82D and a BOSS R1002.

Any help at all or recommendations on troubleshooting would be appreciated.
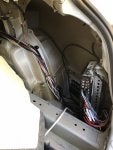
 
#389 ·
I tried following the instructions on this thread. However i get a cloud hissing / electrical noise sound in the rear speakers for some reason. I have tried two different amplifiers with the same result.
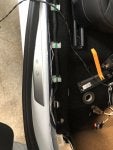
I am powering it from the penthouse.
I have grounded it to the bolt where the seats connect to the side panel.
I tapped VC_LEFT for my 12V remote.
I tapped front woofers and rear speakers at the ICE connector with Posi-taps.
The two amps i am using have high level inputs, which i soldered the 16AWG cable coming from the tapped ICE connector to.

I have tried two different amplifiers. I know they are cheap and not used in this thread, but they are the only ones i could get my hands on quickly. While not optimal, i would assume they would work. I have tired both a Dual Electronics XPR82D and a BOSS R1002.

Any help at all or recommendations on troubleshooting would be appreciated.
Have you tried any other ground locations? I used the factory sub mounting point in the trunk and do not have any hissing.
 
#390 · (Edited)
Hey Everyone,
Thanks to this post and this post for all their help, I finished my install a few days ago. My car did not come with preinstalled rear shelf speakers so I ended up installing my own speakers. The tweeters did make a little difference in high clarity but I really can't tell differnece the rear shelf speakers made unless I'm sitting in the back seat. Adding a sub woofer did add a nice amount of bass to the music.
1. Used these t taps to get the connection from the ICE connector. I Used this speed wire for the connections.
2. I made wood brackets for the rear dash speakers.
3. I used this 5 channel RF amp, it accepts high level inputs so no need for a line out converter. Installed it where the stock amp is on the Long range model using 90 degree metal brackets.
4. I am getting a static hissing from the front and rear speakers, don't know what the problem is, any help will be appreciated.
 

Attachments

#391 ·
Hey Everyone,
Thanks to this post and this post for all their help, I finished my install a few days ago. My car did not come with preinstalled rear shelf speakers so I ended up installing my own speakers.
1. Used these t taps to get the connection from the ICE connector. I Used this speed wire for the connections.
2. I made wood brackets for the rear dash speakers.
3. I used this 5 channel RF amp, it accepts high level inputs so no need for a line out converter. Installed it where the stock amp is on the Long range model using 90 degree metal brackets.
4. I am getting a static hissing from the front and rear speakers, don't know what the problem is, any help will be appreciated.
Some more pictures
 

Attachments

#393 ·
Just got around to hooking up the a-pillar tweeters over the weekend. I wired them in parallel with the mirror tweeters. Even with the HP crossover on my amp I decided to run both pairs through BB-6PR bass blockers. The result is definitely worth it. It cleans up the signal and significantly improves the sound imaging on the front stage.
 
#395 ·
Ok to anyone still following, the rear deck speakers are a MUST!!!. HOLY COW, the clarity it adds to music is amazing. The door tweeters are ok, the SR has been turned to push so much to the front the door tweeters don't do much.

I'm moving on to the sub in the trunk and it's been a B**** not for the faint of heart but I managed to make a huge sub big with all the space in the old sub space.

Here's a half way pic, I'm still at least 10 hours to go.
Did you ever finish this box ? Would love to see some pics and any suggestions/pointers.
 
#396 · (Edited)
Just got around to also hook up the a-pillars. I initially didn't even consider hooking up the a-pillars originally, due to it seeming to be a big pain, and for only a marginal difference. Well as it turns out, you guys will not have to be ripping out any a-pillars as originally posted by PLUR, and if you're already doing everything else, you might as well hook up the a-pillars also.

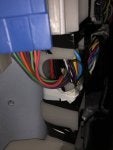
First, you're going to want to take off the black driver side door trim. You're going to find a big blue connector, and there will be your connections for the a-pillar speakers:
Driver side (left): Green(+) Grey (-)
Passenger (right): Orange(+) Brown (-)

The wires will be in a sequence so you should easily discern which is which on the connector.
In the picture below, you'll see my connection of the a-pillar's tapped into the amplified driver side mirror tweeters. I'm essentially tapping in parallel with the mirror tweeters from the alpine amp. The picture doesn't show my connections to the passenger side but all you need to do is tap into the wires, then run them around the seats, and back into the amplified passenger mirror tweeters. Many have added high pass filters and bass blockers. I did not do any of the aforementioned and I think it sounds fine but add those if you'd like.

This only works if you've already tapped into the mirror tweeters, however, if you read my earlier posts on tapping into the mirror tweeters I explained a very easy method on tapping into the mirror tweeters. This is yet again, another easy method on tapping into more speakers. Yes, it is a marginal difference, however it rounds out the music, and would feel like a big waste on not taking advantage of as many speakers as possible. So if you're already planning on adding a sub, and enabling rear deck speakers, definitely go ahead and add all the tweeters and a-pillars as well, because again, take advantage of all the wonderful speakers!